From idea to market-ready product, our NPI solutions make every stage easier, faster. Discover How We Help
Views: 222 Author: Tomorrow Publish Time: 2026-01-30 Origin: Site
Content Menu
● Understanding the Importance of X Y Step in CNC Machining
● What Exactly Are X and Y Steps?
● Why Proper Calibration of X Y Steps Is Critical
>> Key advantages of proper X Y calibration include:
● Step-by-Step Process: How To Determine X Y Step on CNC Machining
>> Step 1: Gather Technical Specifications
>> Step 2: Perform an Initial Test Move
>> Step 3: Apply the Correction Formula
>> Step 4: Update Controller Settings
>> Step 5: Validate and Recalibrate Regularly
● Factors That Influence X Y Step Accuracy
● Advanced Tools for X Y Calibration
● Real-World Example of Calibration
● Common Mistakes to Avoid During Calibration
● Tips for Long-Term Precision in CNC Machining
● Software Support and Digital Calibration
● FAQ
>> 1. What does the X Y step mean in CNC machining?
>> 2. How often should I recalibrate my CNC machine?
>> 3. Can software automatically adjust step values?
>> 4. What causes inconsistent X Y step results?
>> 5. Are stepper and servo motor calibrations different?
In modern industrial production, CNC machining has become the cornerstone of precision manufacturing. Every intricate component and complex contour depends on the accurate motion of the machine's axes. Among the many calibration parameters in CNC machining, determining the X and Y step stands out as one of the most important tasks for ensuring precision, repeatability, and consistency.
If the X Y step calibration is even slightly off, your finished parts may deviate from the intended design — circles may appear slightly oval, edges may not align, and the overall dimensions may mismatch. To avoid these issues, understanding how to determine the X Y step in CNC machining is crucial for any machinist, technician, or manufacturing engineer.

The X and Y axes form the foundation of most CNC machining operations. In milling, routing, and engraving, the tool's linear movements along these axes directly define the geometry and size of the final component. Each step of movement represents a fractional rotation of the stepper or servo motor that drives the axis.
The X Y step value, expressed as “steps per unit” (often steps/mm), defines how many electrical pulses the motor must receive to move one millimeter. If this value is incorrect, the machine's motion will either overshoot or undershoot the intended distance, thereby leading to scaling errors.
Accurate X Y step settings are essential because they:
- Guarantee dimensional accuracy of machined components.
- Ensure consistent repeatability in serial production.
- Minimize mechanical wear by promoting proper movement synchronization.
- Enhance surface finish quality through smoother, more accurate motion.
Ultimately, correct calibration of the X and Y steps forms the backbone of high-precision CNC machining.
In simple terms, each step represents a tiny fraction of tool movement along an axis. The CNC machining control system sends electrical pulse signals to stepper or servo motors. Each signal causes the motor to rotate a small angle, which in turn moves the axis via lead screws, belts, or linear drives.
For example, if one revolution of a lead screw moves the axis 5 mm, and the motor requires 200 steps per revolution, then one step moves the axis 0.025 mm. However, most modern systems implement “microstepping,” subdividing each step into smaller fractions (like 1/8 or 1/16), which further improves resolution.
Therefore, by calculating the correct steps per unit, you can instruct the controller exactly how many pulses correspond to a specific movement distance. The closer this calculated value matches the actual movement, the more accurate your CNC machining will be.
Precision in CNC machining depends not only on machine rigidity or tool sharpness but also on motion calibration. Even if the mechanical construction is excellent, inaccurate X Y steps can lead to consistent dimensional errors.
- Dimensional reliability: Your machined parts precisely match the CAD model dimensions.
- Higher production yield: Reduces part rejection rates caused by scaling deviations.
- Process efficiency: Eliminates time wasted on repeated adjustments.
- Machine longevity: Smooth and accurate movements reduce strain on mechanical components.
Ignoring proper calibration, on the other hand, often results in cumulative errors across multiple machining operations, tool wear due to compensation attempts, and loss of confidence in machine accuracy.
Before any calibration, identify and record the physical parameters of your machine:
1. Lead screw pitch (distance traveled per revolution of the screw).
2. Stepper motor resolution (number of steps per revolution, typically 200 for 1.8°).
3. Microstep value set on the motor driver (e.g., 1/8, 1/16, or 1/32).
4. Gear or pulley ratios if applicable to belt-driven axes.
Using these values, calculate your theoretical steps per unit with this formula:
Steps per mm = (Motor Steps per Rev × Microstep Value) ÷ Lead Screw Pitch
Example:
Lead screw pitch = 5 mm/rev
Motor = 200 steps/rev
Microstep = 16
Steps per mm = (200 × 16)/5 = 640 steps/mm
Record this initial value into your machine control software such as Mach3, GRBL, or LinuxCNC.
Next, command your CNC machining center to move a fixed distance, preferably 100 mm, along the X axis. Use an accurate measuring instrument — a digital caliper, laser distance meter, or dial indicator — to measure the actual travel.
If the measured distance is not exactly 100 mm, you've identified a calibration deviation. Record the actual value displayed by your measuring tool.
Example: Commanded = 100 mm; Actual = 99.6 mm.
To refine your calibration, use this correction formula:
Corrected Steps per Unit = Current Steps per Unit × (Commanded Distance ÷ Actual Distance)
Using the previous example:
Corrected Steps/mm = 640 × (100 ÷ 99.6) = 642.57 steps/mm
This adjustment compensates for any scaling error caused by mechanical or electronic discrepancies.
Repeat the same testing and correction process along the Y-axis.
After calculating the corrected value, enter the new steps/mm value into your CNC machining software configuration. Save the changes and perform another test motion to confirm accuracy.
A properly calibrated axis should produce an actual movement that matches the commanded distance within ±0.01 mm or even better, depending on machine grade.
If deviations persist, repeat the process until you consistently achieve accurate positioning.
Even after calibration, mechanical components naturally wear over time. Temperature fluctuations, dirt buildup, or vibration can gradually affect positioning accuracy. Therefore, periodic recalibration every three to six months is highly recommended.
Recalibration should also be performed after:
- Replacing ball screws or belts
- Changing motor drivers
- Altering gear ratios or microstepping settings
- Conducting major maintenance
Scheduled recalibration guarantees that your CNC machining continues to produce precise and consistent results.

Multiple mechanical and environmental factors may cause small variations in the actual machine motion compared to theoretical movement.
- Backlash: The gap between mating parts of lead screws or nuts can cause position lags.
- Temperature effects: Heat expansion of metal parts can distort travel lengths.
- Machine rigidity: A flexible frame or worn bearings can shift axis alignment.
- Microstepping instability: High microstepping values may reduce motor torque and accuracy.
- Electrical interference: Noise in signal wiring may affect pulse integrity.
- Power fluctuations: Unstable voltage may cause inconsistent step execution.
To maintain high CNC machining precision, regularly inspect these mechanical and electrical factors.
Professionals in CNC machining often use advanced metrology equipment to measure and calibrate axis movement with micrometer-level precision. Some of the most effective tools include:
- Laser interferometers: Offer extremely accurate measurements for axis travel and linearity.
- Linear glass scales: Real-time feedback to compare actual movement with commanded distance.
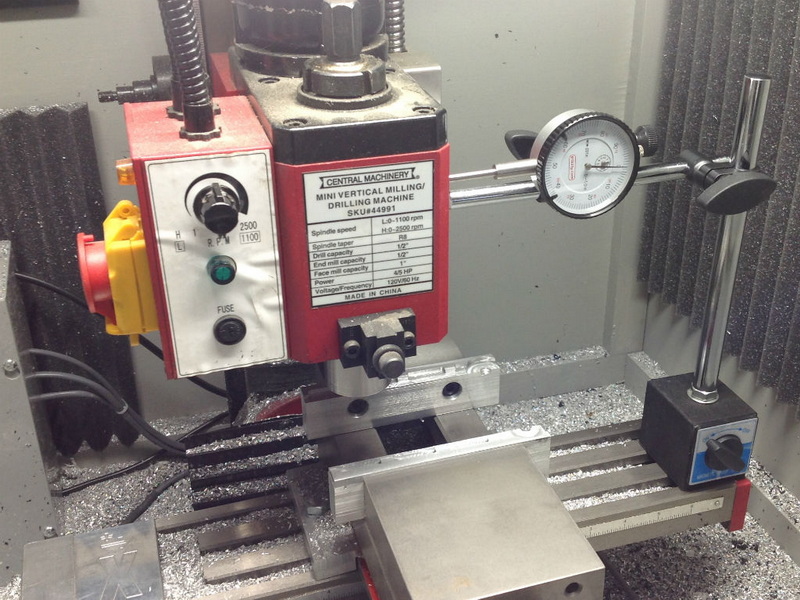
- Dial gauges: Cost-effective tools for setup and testing during initial alignment.
- Ballbar systems: Measure circular path errors and identify calibration imbalance between X and Y.
- Digital micrometers: Verify short-range step distances for micro-calibration.
By combining these tools, machinists can ensure their equipment operates within required tolerance limits.
To illustrate, assume your router's X-axis has:
- Lead screw pitch = 10 mm/rev
- Motor = 200 steps/rev
- Microstep = 8
Theoretical steps/mm = (200 × 8)/10 = 160 steps/mm
You command the axis to move 150 mm, but the actual measured movement is 149.5 mm.
Correction formula yields:
160 × (150 ÷ 149.5) = 160.53 steps/mm
Entering this corrected value aligns the actual movement perfectly with the command distance.
This iterative approach ensures your CNC machining operations achieve engineering-grade precision within minimal error margins.
While calibrating X and Y steps in CNC machining, even minor oversights can lead to significant inaccuracies. Carefully avoid these common pitfalls:
1. Ignoring backlash compensation. Measure only in one direction to avoid backlash distortion.
2. Using inaccurate measuring tools. Always rely on certified instruments for calibration.
3. Skipping warm-up cycles. Machines expand slightly after operation; always calibrate after thermal stabilization.
4. Confusing inches and millimeters. Ensure consistent measurement units across control software and test instruments.
5. Incorrect microstep settings. Verify microstepping configuration in both driver and software.
By adhering to these practices, you prevent the most common calibration mistakes and maintain stable axis performance over time.
Sustaining accuracy after calibration is equally important as the calibration itself. Below are long-term maintenance strategies to preserve step accuracy in CNC machining systems:
- Perform a full mechanical inspection quarterly.
- Regularly clean lead screws, bearings, and guide rails to prevent dirt interference.
- Maintain a stable room temperature to avoid thermal drift.
- Record calibration data in a logbook for traceability and future reference.
- Replace worn mechanical parts before they impact axis consistency.
- Periodically recheck machine squareness between X and Y axes using alignment gauges.
Stable mechanical and environmental conditions are essential to uphold the repeatability expected from precision CNC machining systems.
Modern CNC machining control systems come equipped with calibration wizards and digital compensation tools that significantly simplify the X Y step determination process. These include:
- Mach3 Calibration Tool: Automatically calculates correction values based on test movement input.
- GRBL Configurator: Allows easy adjustment of steps/mm in open-source CNC controllers.
- Fanuc and Haas systems: Offer built-in axis compensation and real-time motion correction for industrial machines.
Using these digital features ensures that X and Y calibration remains precise even when environmental changes occur or when mechanical play varies slightly.
Determining the X Y step on CNC machining equipment is a fundamental yet highly technical procedure that ensures accurate, reliable, and repeatable machining results. Through careful measurement, calculation, and validation, machinists can synchronize digital commands perfectly with physical movements.
Proper calibration not only improves dimensional accuracy but also extends machine life, enhances surface quality, and boosts production consistency. Maintaining precise X and Y step values is not a one-time task — it is an ongoing commitment to precision manufacturing and process excellence.
For every machinist, engineer, or CNC operator striving for accuracy, mastering the determination of X Y steps is an essential step toward achieving the highest quality standards in CNC machining production.
Contact us to get more information!

It refers to the smallest incremental movement of the machine along the X and Y axes, determined by the motor's step rate and lead screw pitch. It defines the motion resolution of CNC machining.
Calibration every three to six months is recommended, depending on machine workload and environmental conditions. For heavy-duty CNC machining, more frequent checks ensure accuracy.
Yes. Many control systems like Mach3 or GRBL include calibration tools that automatically calculate new step values based on test measurements.
Common causes include backlash, unstable microstepping settings, mechanical wear, and temperature variations affecting expansion.
The principles are the same; however, servo systems use encoder feedback, which provides automatic error correction, while stepper systems rely solely on fixed step counts.
1. https://www.machsupport.com
2. https://linuxcnc.org
3. https://github.com/gnea/grbl
4. https://www.haascnc.com
5. https://www.fanucamerica.com
This in‑depth guide ranks key surface finishes manufacturers and service providers in Finland, explains Nordic sustainability and quality requirements, and shows how CNC OEMs like Shenzhen Feifan Hardware can partner with Finnish finishers to deliver durable, compliant products for the Nordic market.
Discover the top surface finishes manufacturers and suppliers serving Tajikistan, how to pair them with CNC precision parts from Shenzhen Feifan Hardware & Electronics Co., and what real customers value most in quality, lead time, and long‑term reliability.
Discover how to choose top surface finishes manufacturers and suppliers in Afghanistan based on real customer experience. Learn key evaluation criteria, see representative players, and explore how Shenzhen Feifan Hardware’s CNC OEM services integrate with Afghan finishing partners.
This in‑depth 2026 guide ranks top surface finishes manufacturers in Iran, explains what real buyers value, and shows how Shenzhen Feifan’s CNC precision parts can integrate with Iranian coaters for high‑performance, export‑ready components.
Discover the top surface finishes manufacturers and suppliers in Thailand for 2026, based on real buyer experience. Learn how to combine Thai finishers with Shenzhen Feifan CNC OEM/ODM services to optimize quality, lead time and total cost.
This in-depth guide helps OEM and ODM buyers evaluate top surface finishes manufacturers in Switzerland using real customer-focused criteria. Learn how Swiss coating experts, combined with CNC suppliers like Shenzhen Feifan, can boost quality, reliability, and total cost efficiency.
Poland is emerging as a key hub for high‑quality surface finishing in Europe. This in‑depth guide explains how global OEMs and CNC suppliers can evaluate Polish finishers, compare top manufacturers, optimize total cost and build reliable cross‑border supply chains.
Discover top surface finishes manufacturers and suppliers in Indonesia, how they support CNC precision parts and key industries, and how OEM/ODM buyers can qualify reliable partners. Includes illustrative rankings, practical checklists, and guidance for integrating Chinese machining with Indonesian finishing.
Discover top surface finishes manufacturers and suppliers in Malaysia, how they support CNC precision parts and architectural projects, and how OEM/ODM buyers can qualify reliable partners. Includes rankings, buyer checklists, and practical sourcing insights for B2B decision makers.
Discover the top surface finishes manufacturers in Turkey for OEM and ODM projects. This in‑depth guide ranks anodizing and coating suppliers, explains what global buyers really care about, and offers practical checklists to secure reliable long-term partners.
Discover the leading surface finish suppliers in the Netherlands, how they work with CNC manufacturers like Shenzhen Feifan, and what industrial buyers should consider to secure reliable finishing, compliance, and long-term supply for OEM and ODM projects.
Discover leading surface finish manufacturers in Russia with a 2026, experience-focused ranking. Learn how CNC buyers and OEM/ODM partners like Shenzhen Feifan can choose reliable coating suppliers, cut rework, and improve long-term performance.
This guide explains how top surface finishes manufacturers and suppliers in South Korea support high‑performance CNC precision parts, and how Shenzhen Feifan Hardware & Electronics Co. can collaborate with Korean experts to build a durable, cost‑effective OEM and ODM supply chain.
This guide ranks top surface finishes manufacturers in Portugal from a customer‑experience viewpoint and explains how CNC precision parts makers like Shenzhen Feifan Hardware & Electronics Co. can integrate Portuguese finishing into high‑value OEM and ODM supply chains.
Italy hosts a dense network of Surface Finishes Manufacturers And Suppliers serving automotive, aerospace, construction, and machinery OEMs. Learn about key processes, market trends, and how overseas buyers can integrate Italian finishing partners with global precision machining supply chains.
This article explores the growing ecosystem of Surface Finishes Manufacturers And Suppliers in Arab States, key application sectors, representative regional players, and how Chinese precision OEMs can partner with GCC‑based finishers to deliver durable, cost‑effective solutions.
France’s advanced ecosystem of **Surface Finishes Manufacturers And Suppliers** supports automotive, aerospace, construction and industrial customers with high‑performance, sustainable finishing solutions shaped by strict EU regulations and fast‑growing functional coatings demand.
Germany hosts a dense network of advanced Surface Finishes Manufacturers And Suppliers serving automotive, machinery and construction. This article explains market trends, key processes, representative suppliers and sourcing strategies for overseas OEMs targeting German finishing partners.
Japan has become a global hub for precision surface engineering. This in-depth guide explains how Surface Finishes Manufacturers And Suppliers in Japan support automotive, electronics, aerospace, and medical OEMs, and how overseas buyers can build successful, compliant partnerships.
Spain has a mature ecosystem of Surface Finishes Manufacturers And Suppliers serving automotive, aerospace and industrial OEMs. Learn about key regions, leading companies, market trends and how overseas precision‑parts producers can partner with Spanish finishers to serve the EU market.